24-hour Texas Time Trials (2015)

Pre-Race

On September 25th I rode my first event in Texas — the Texas Time Trials. They are hosted by Dan Discroll, who is also the RBA (organizer) of a local randonneuring group. They are put on in the community of Glen Rose, some 90-minutes SW of Dallas.

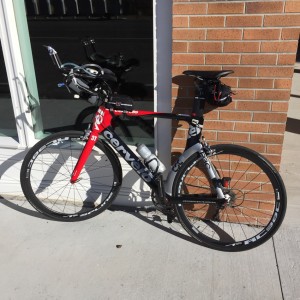
I flew in the previous day so I could get my bike assembled and make sure everything was working. This was my first experience in shipping or flying with a bike, so I was a bit apprehensive. I shipped it ahead using the service Bike Flights (via UPS Ground). The cost was about the same as flying with on Southwest Airlines — it was waiting for me at the motel, so I didn’t have to hassle with it in the airport and rental car.

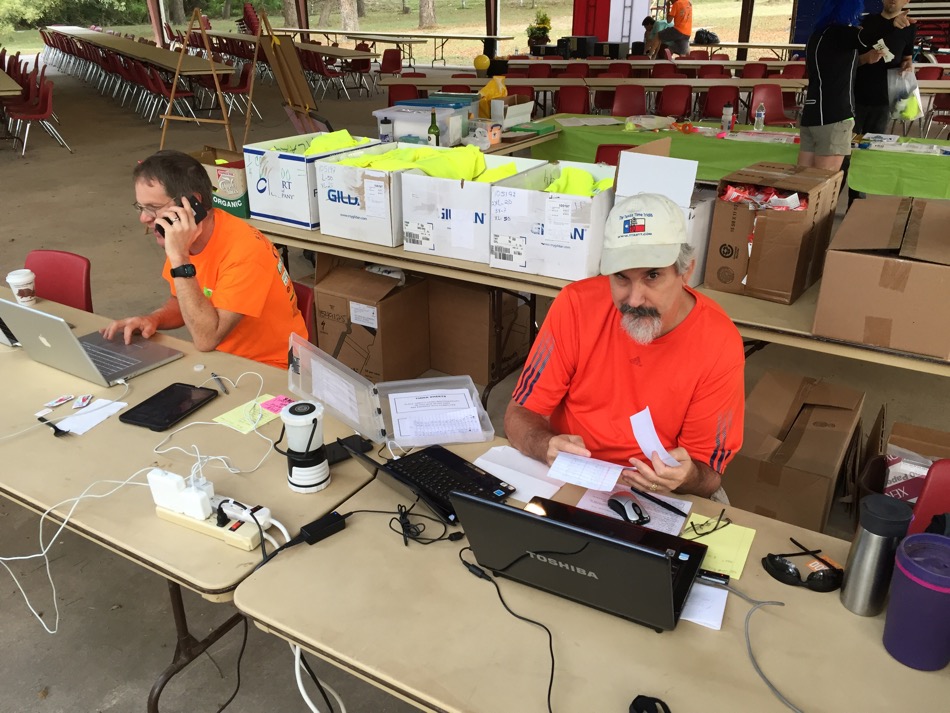
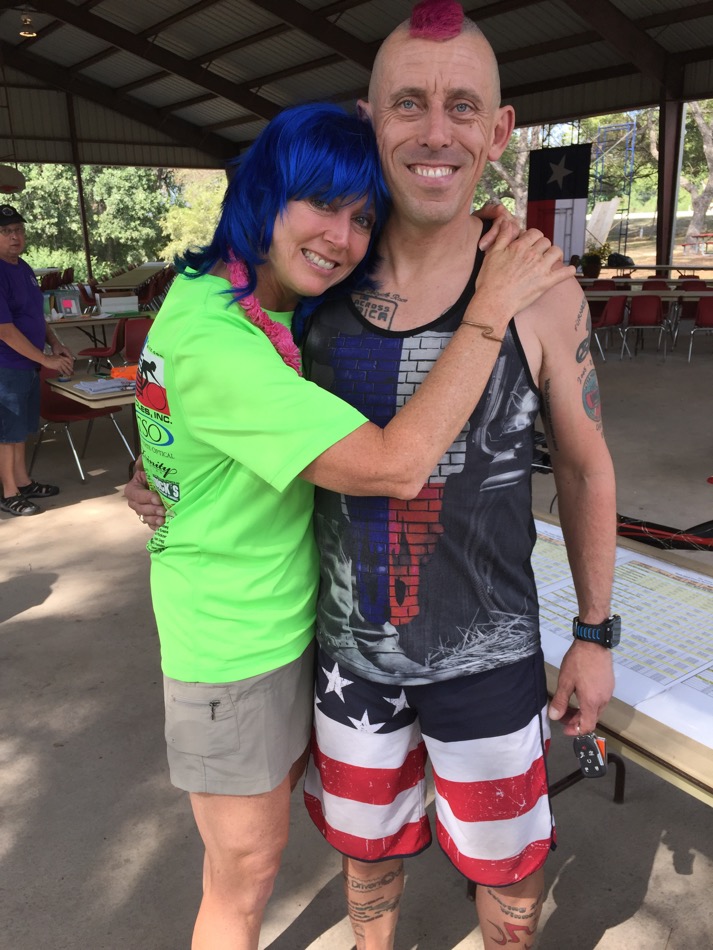
This non-drafting 24-hour “Iron Butt” race started at 5:00 p.m. on Friday. Other events started earlier or later, depending on the distance. Upon my arrival I received a warm greeting from Dan and his co-organizer, Pam Wright. I also meet volunteer Gary Gottlieb, who is a legendary distance cyclist and local randonneur.

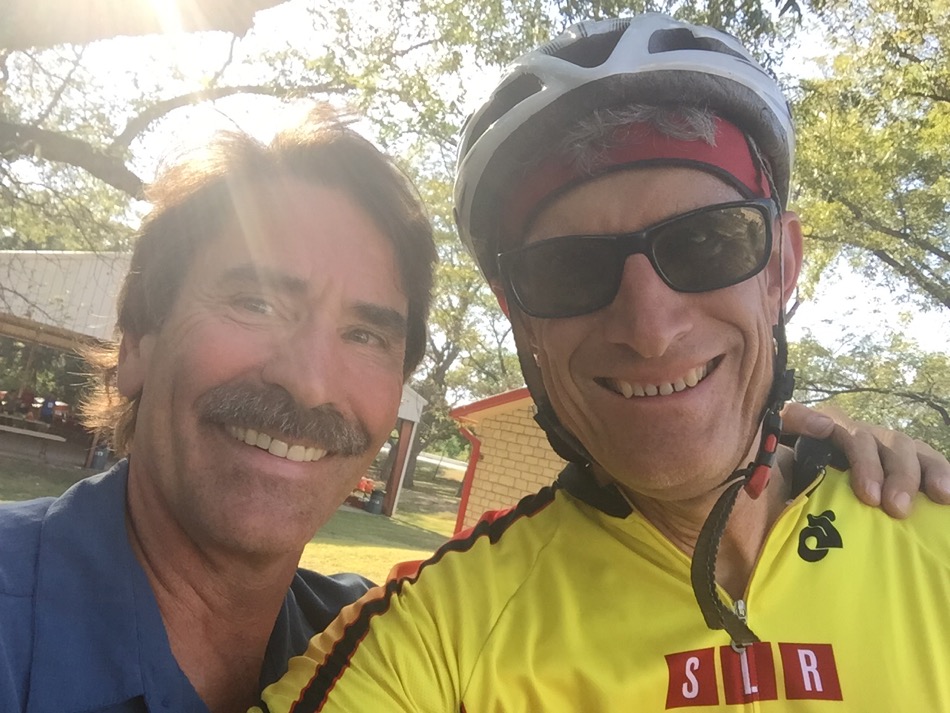
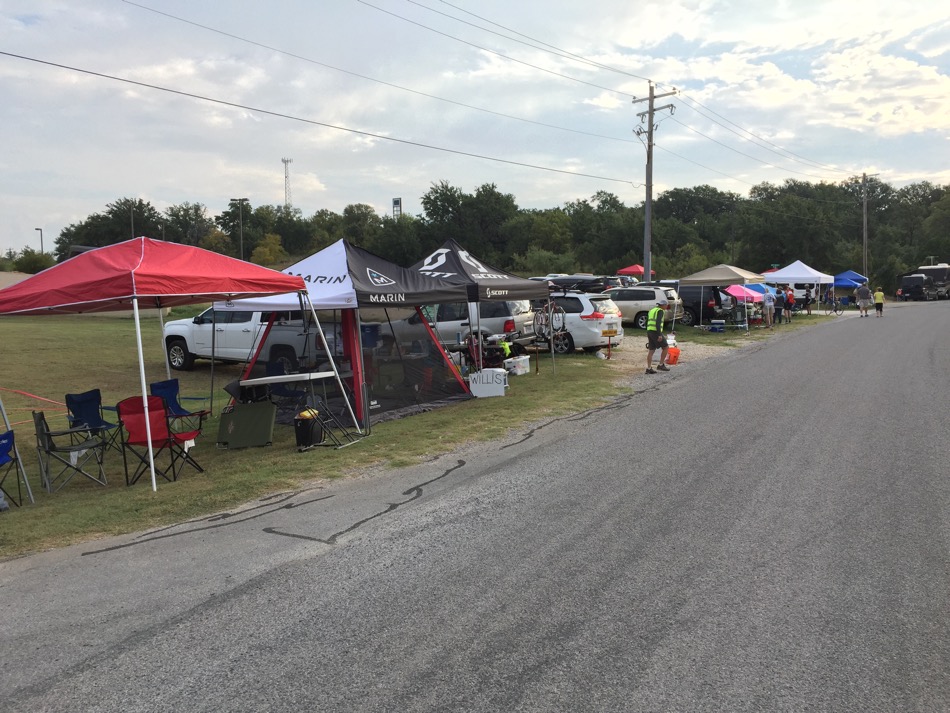
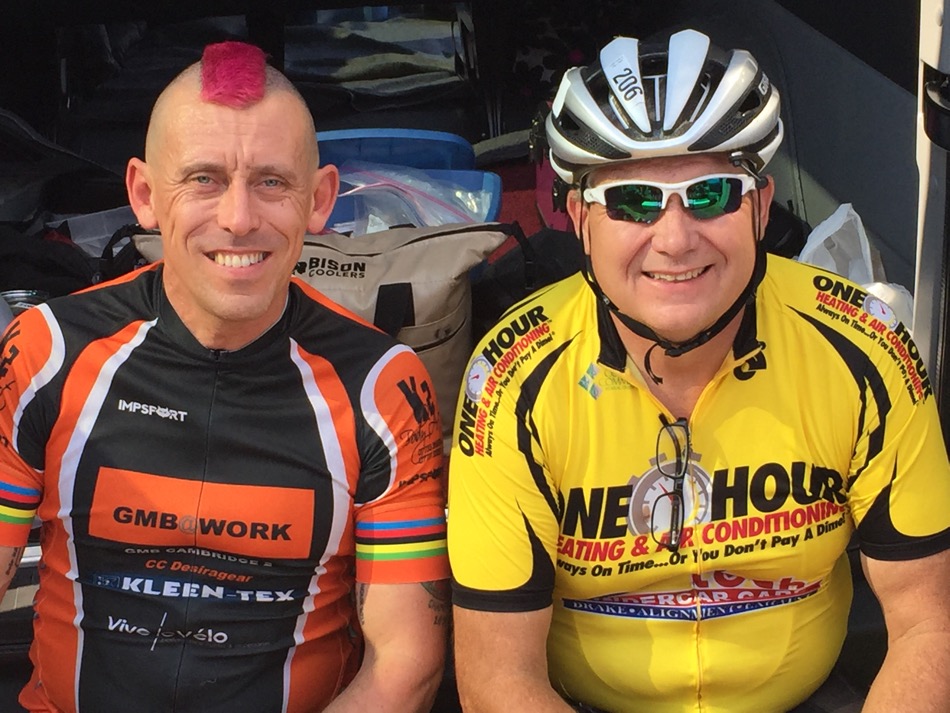
During the day on Friday, I just chilled in the shade of the pavilion and pre-loaded electrolytes and fluids. The forecasted high was in the mid to upper 80s. Perfect weather. Since I was flying in, I prearranged to share my “pit” with a friend I met at the Texas Hotter N’ Hell show, Larry Eads. He provided me with a cooler and I was able to share his tent.

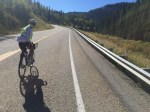
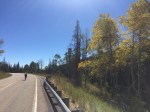
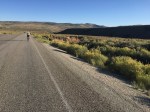
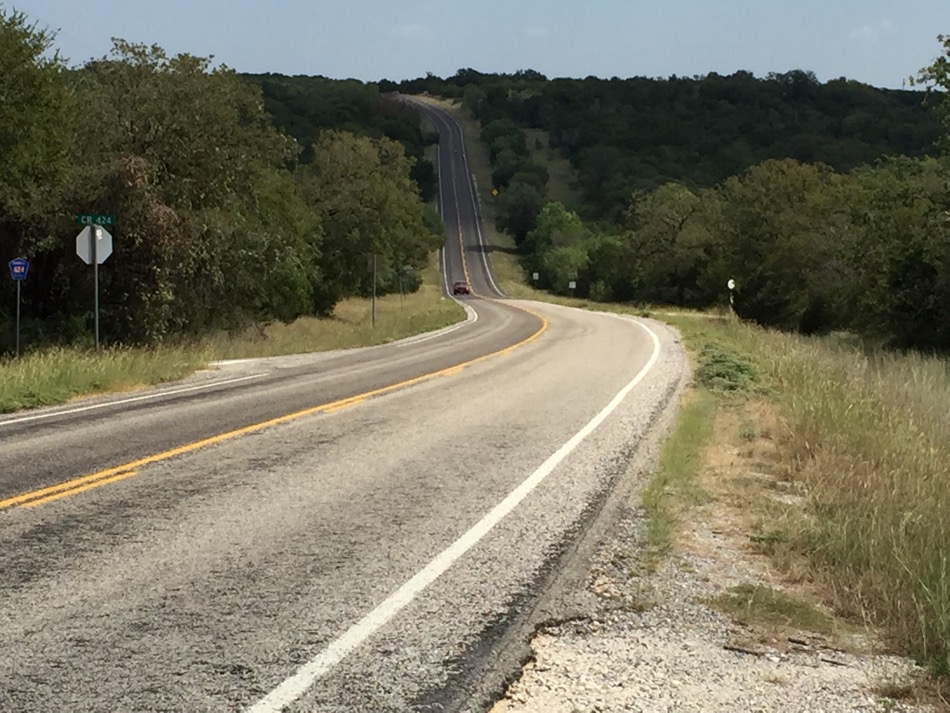
I had looked at the route ahead of time online, and unlike the other 24-hour race which I did the prior season, this one had a lot more climbing. I had a 12-30 cassette on my 10-speed carbon wheel, but the cranks were the typical time trial configuration, which is 53-39. I was a little apprehensive that this gearing may not be low enough, especially later in the race, as I tire and my strength drops. The loop was 26.4 miles with about 1200 feet of climbing.

Night Riding

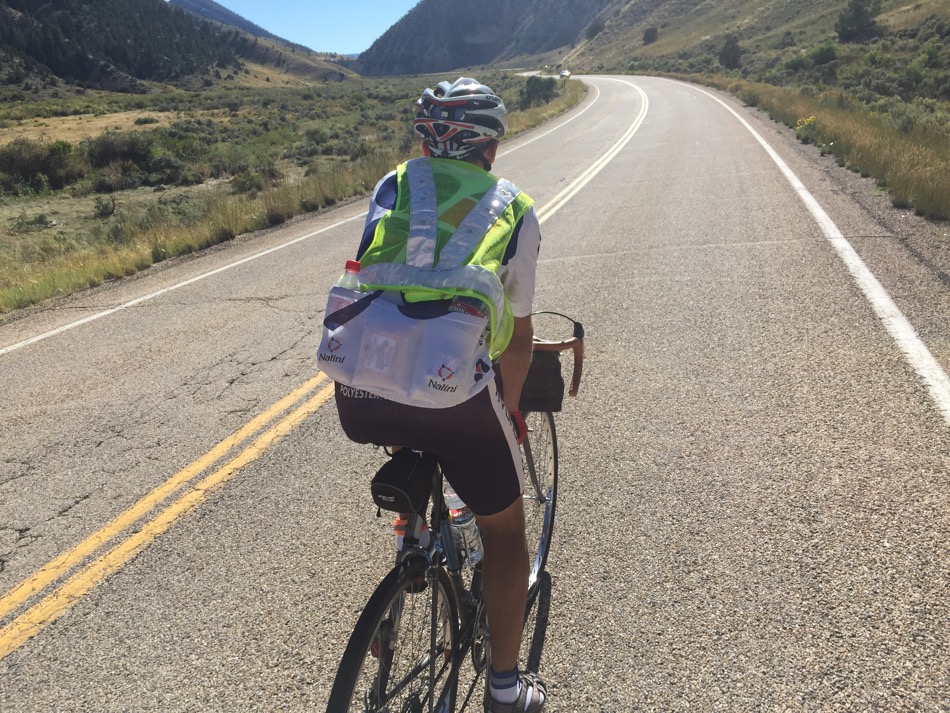
The race started on time and I carried two water bottles on my bike. One on the bottle cage and a 2nd on a jury-rigged insulated pouch mounted underneath my aerobars. This necessitated stopping and pulling it out to switch as I couldn’t quite reach around far enough while clipped in. I started out with Hammer Perpeteum in my main bottle and fig newtons in my eoGEAR Century Deluxe top tube bag. My stomach was a little queasy for the first hour or two, but it later settled down. I did not have a crew person, so the idea was to stop at the “pit” every few hours, or as needed, to refill my bottles, eat solid foods and top off my top tube bag with more nutrition.

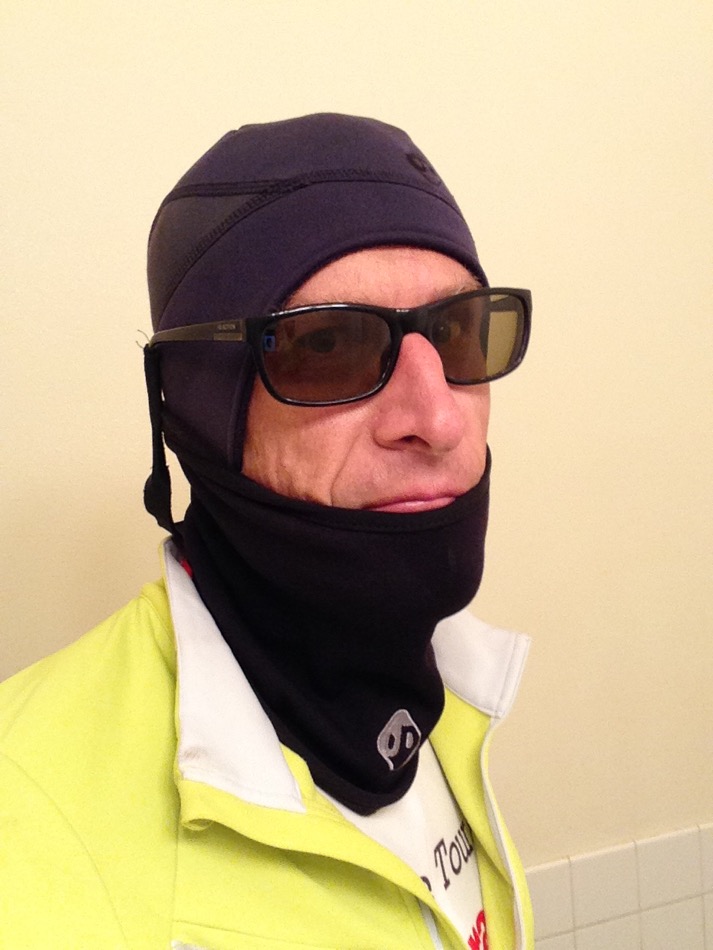
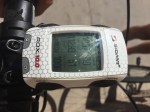
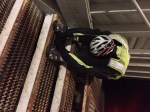
I managed to get in four laps before I ran out of fluids, so finally, after knocking out a little over a 100 miles, I stopped at the pit and topped off everything. In cooler temperatures, I find I can go a quite a distance with minimal fluids, as long as I have sufficient nutrition. The night was so comfortably warm, so that I only needed to add arm warmers. I had a wind vest stashed in my seat bag, but ended up not needing it. What a difference to riding in Utah, where the temps drop down do 40 or 50F at night in the summer or early fall. The key to night riding is to keep moving and not stop for very long, otherwise you will chill and want to put on more clothing, that may cause overheating later on. I did have to be mindful of my battery life of my front “white” light and also switch out batteries during the night. As it turns out, with my Cyglolite 740Xtra, one large and one small battery were enough to get me through the night. Since I was doing the same loop over and over again, I was able to ride with my light on the lowest setting, since I became familiar with each of the turns and stops. At one point, in the middle of the night, I did see out ahead, a “thing” cross the road — it appeared to be an armadillo, but I could not be sure. I would hate to have an encounter with one those with my skinny 25mm-wide tires!

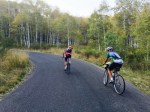
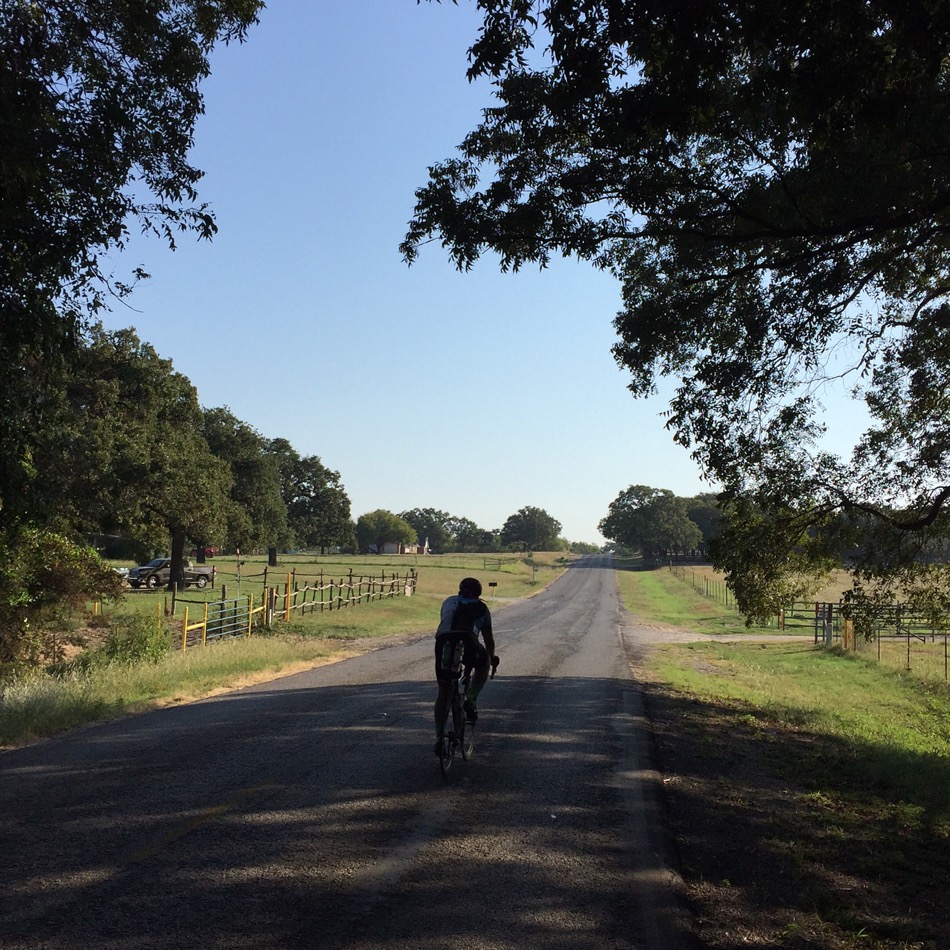
This route had many short rollers (up to 6%) and consequently, I found myself out of the saddle on the climbs and in the aerobars on the flats and downhills, as I tried to build up speed for each upcoming hill. Consequently, I had no “Shermer’s Neck” problems because I was moving around enough on the bike and not constantly in the aero position.

Finally, Daylight

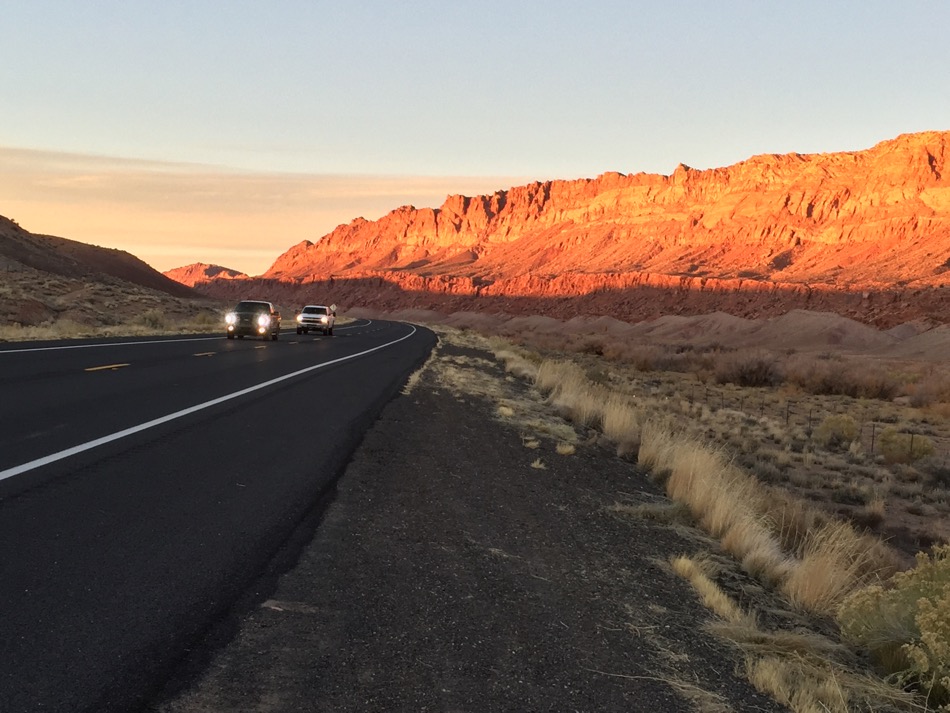
Sunrise finally came and at the first opportunity, I dumped off my lighting gear to save weight. I am rejuvenated by the sun and my pace seemed to pick up a little. Later in the day, it did get pretty hot, but I used insulated bottles and filled them with lots of ice. I don’t mind temperatures in the mid to upper 80s, as long as I can keep cold fluids going down. With the heat, I ended up stopping nearly every 26-mile lap to refill both of my bottles. At one point, I passed another cyclist who was walking his bike on a rather flat section and I asked “are you OK, need anything?” His response was “yeah, I just need a new back!”

As we rode into the city of Glen Rose, the organizers had arranged for a police officer to be at the main downtown light and wave us through, holding up traffic. That was nice as it was at the bottom of a gradual hill. I had no flats or mechanicals, so I didn’t need the roving support vehicles that cruised the route 24/7.

The Results

I just kept on doing laps and ended up rolling into the finish line with 344 miles and about 20 minutes left on the clock. This race offers no short loop option, so if I wanted to get more mileage, I would have to complete another complete lap, which was taking over 90 minutes each and they would pro-rate my mileage for the 20-minutes left. As it turns out, I was the only 60-year old in my category, so I had nobody to “beat,” and I decided to call it quits. That provided me with a 5th place overall finish, out of 18 solo guys (of all ages). 1st through 4 get a spot on the podium.

Afterwards I headed to my motel (across the street) and showered. At 7:00 p.m. was a great banquet and awards ceremony, after which I promptly proceeded to my room to catch up on some badly needed sleep.

Many thanks to Dan, Pam and their many volunteers for sponsoring such an epic event. This is the 14th year for this event. And I extend my appreciation to Larry Eads for taking me under his arm and sharing pit space and his hospitality.

My Strava upload.

Followup

After arriving home, I wrote an e-mail to Dan with the following feedback and impressions of this well-organized event. Most of it is below:

Pro:
  • No rumble strips on the route (they are MUCH worse than chip seal, which we also have a lot of in Utah)
  • No tight “dangerous” turns on the downhills. I could bomb them all, as they had decent run outs.
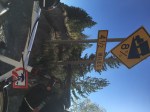
  • Blinky lights at T intersections was most helpful
  • Mileage markers all along the route were appreciated
  • Easy, common-sense reflective gear rules (not as rigid as 24-hour World’s in Boreggo Springs, CA)
  • End of season timing, which works for me, since I don’t usually start doing long (300K or longer) rides until May
  • Friday-Saturday riding with no cycling on Sunday (that is due to my Christian religious-convictions)

Con:

  • This course as a fair amount of climbing for a time trial event. My GPS showed 1,131 feet per lap. I wonder if you had a flatter course, that you might attract more triathletes, which would use this for training purposes (although in September, most are done for the season).
  • No small “end of day” loop. If you roll in with time left on the clock they allow you to finish one more lap and then pro-rate your mileage accordingly. I rolled in with 20 minutes left on the clock. Mentally, I just couldn’t deal with doing another full enchilada lap (90+ minutes)…and get such a small portion credited to me. Is doing an out-and-back with a turnaround before the Nemo climb, not feasible? With a couple of volunteers stationed there, verifying completion of laps? Too many riders to keep track of? I understand that Bessie’s Creek 24-hour race, also in Texas, has some sort of honor system for doing partial laps.

10 Tips for Staying Warm while Cycling in the Winter

IMG_1494-2.jpg

Although living in the mountains of Central Utah at 6,000 feet is not as cold as Wisconsin, it still is a constant battle when trying to road cycle during the winter months. I have heard it said on other blog posts that “if you don’t feel a little cold before starting, you are overdressed.” For backcountry skiing & running I would agree with this statement, but for cycling, I disagree. I want to feel comfortable before I clip in — this is because of the wind chilling affect once you get moving.

I found the following pieces of clothing or equipment enable me to “comfortably survive” an all day ride during these cold winter days.

Feet

I use a medium-weight merino wool/synthetic blended running sock and chemical toe warmers. Sometimes I use a taller calf-length sock instead. Originally I started out using the Planet Bike Comet Shoe covers (aka neoprene booties), but found them to be much too large and bulky, catching on my crank arm — a very poor fit and design. I have since then switched to a Pearl Izumi ELITE Softshell MTB Shoe Cover and found they work very well. I like the back Velcro closure, instead of a zipper as found in other models.

Tip #1. Don’t wear socks that are too thick as they will impede your circulation. Chemical toe warmers work great, at least for about four or so hours. Try them — use them. Consider getting a larger ”winter only” pair of cycling shoes.

In February of 2016 I purchased a pair of 45Nrth Japanther cold weather shoes. They are designed for temps of 25-45F but I bet they would perform fine in lower temps. They are totally sealed on the bottom and would be perfect for wet-weather rides when a shoe cover is not enough (after prolonger time, water can penetrate through the holes where the cleats are on conventional MTB shoes). I later sold them as they were too stiff, not allowing my ankle to flex enough. I replaced them with a pair of Fizik Artica X5 boots.

45nrthjapanshoes

Pedals

In the winter, due to bulkier footwear, my heel rubs against my crank arms or chain stays. Also, due to a problem with my left ankle, this is exacerbated. I have started using the iSSi-brand SPD mountain bike pedals (instead of my Shimano A520s, which use the same cleat) because they offer it with a longer spindle. I prefer the +6mm model. The +12mm model is a bit overkill.

Tip #2. If necessary try a pedal with a longer spindle so you have more clearance so your foot doesn’t rub or so that your bulky winter clothing doesn’t catch on your chain.

Hands

As one that does or has done a lot of cold weather sports like mountaineering and randonnée skiing (i.e. skimo or ski mountaineering), I have an assortment of gloves and mittens. I wrote a separate post on gloves, so visit that page for more info. Essentially, I use insulated mountaineering gloves with an inner liner that is made from fleece and/or neoprene. From 2017 to 2019 I started using a pair of Pearl Izumi Men’s ELITE Softshell Gel Glove which have 100 g of Primaloft Gold insulation in them. By themselves, they worked for me with a temperature range of about 25F to 50F. I liked them so much I also started to use them for backcountry skiing.

I have a pair of the well-designed Bar Mitts, but for me they don’t work as I switch back and forth between my hoods, drops and particularly my aerobars.

Tip #3. Layer your gloves, so when the weather gets warmer, later in the day, you can jettison the outer pair, while only wearing the inside pair.

Lower Body

As is standard practice with cycling bibs or shorts with a built-in chamois, wear no undies. I like the Craft Storm Bib-Tights made with their proprietary Vent-Air fabric. This bib has a windproof fabric in the front with a more breathable and stretchy soft fabric in the back. On super cold days (15-25F) I will also layer on top of them a heavy pair of leg warmers.

Tip #6. Many times one “windproof” layer over your crotch is sometimes just not enough. Use a lightweight pair of running shorts (blue product in the photo) and slip them over your bibs. Sure, it looks dorky, but it gets the job done. Later in the day, when it is warmer and/or when my body starts putting out more heat, remove them, stashing them in an eoGEAR seat bag. This extra layer should keep your “parts” from freezing.

Tip #7. Rather than wearing long underwear, which can cause chafing, consider putting on full-length leg warmers over your tights instead for that “extra” lower extremity layer.

Head

IMG_1863-0.jpg

I think I have nearly every style of head covering made. This is unlike water bottles (not just for cycling, but for skimo & SUP) — I’m anal about the details and keep trying new ones till I find one that is “the one.” Because of the circumference and “over the top” measurement of my head, I’m truly a fat-head. I find it difficult to find a hat that stays down over my ears. And going 20-30 MPH on a bicycle, my ears have gotta be covered in temps lower then 50F.
Currently, my favored models are from the brand Outdoor Designs from the U.K. My (for eoGEAR) primary outdoor distributor sells this brand and they are comparable to The North Face or Outdoor Research in the U.S. The cap I use is the Power Stretch Scoop with Polartec Powerstretch. Is has a stretch panel in the back providing as snug fit, yet big enough for my huge head. I then overlap it with an Outdoor Designs Power Tube neck gatior, made from the same material. I have used some hats that were simply not breathable enough (which used Polartec Windbloc) and my ears and side of my face got all wet from perspiration, which creates a whole another problem.
Sometimes, underneath my hat, I have also used a thin, but very windproof ear covering called the Halo Anti-Freeze Headband, (not shown in above photos) which is made from Dryline fabric. It is very windproof, but doesn’t cause my whole head to overheat and sweat.
Years ago, I originally started trying out various synthetic balaclavas but found they did not provide the same sung fit as this two- or three-piece arrangement — this is important with the higher moving speeds in road cycling, compared to MTB or gravel grinding. Besides, if it does get warmer, later in the day, I can loose a few of these layers.
I prefer synthetic head products as they are thinner compare to wool, and I need to still have enough space to put on my helmet!

Tip #4. In moderate temperatures of about 50-60F wearing your glasses under your headwear is OK. They just stay put better that way, but in colder temps, it is much warmer to put them on the outside (per the above photo), so the wind doesn’t seep into your cap and freeze your ears.

Tip #5. Choose head coverings that are ergonomically designed, instead of an “ordinary looking” beanie, which hikes up and off your ears, when you look up, i.e. when you are in the drops or on aerobars. Be careful of the thickness build-up so that your helmet will  still sit down properly to give you safe coverage. For that last reason, I prefer synthetic hats.

Upper Body

I generally wear a short-sleeve thin polyester base layer next to my skin (green in the photo). I don’t own any wool base-layer products, but should consider them because some synthetics can get stinky after a whole day of hard pedaling — at least the old polypro products did that. The newer polyesters are better. Over my base t-shirt I wear a mid-weight long sleeve mock turtle. Over that goes my jersey. My next layer is a skimo vest from Dynafit. It is insulated from Primaloft and has stretch side panels providing a nice tight, aerodynamic fit.

Over all that goes my “go-to” soft shell cycling jacket from Craft (neon yellow in photo). Craft, from Sweden, not only supplies apparel to cyclists, but also to nordic skiers — they know a thing or two about cold weather sports! This jacket uses their Vent-Air fabric and has just the right blend of windproofness and breathability.

There are four types of shells or jackets:

  • Hard shells are typically made from a thin nylon fabric with a waterproof/breathable laminate like the original GoreTex. The outside is treated is usually DWR treated to prevent water from soaking into the nylon fabric. They are designed for use in heavy or continuous rain. The best models are seam taped, meaning the sewn seams are fused together with an overlapping clear tape on the inside, so moisture doesn’t penetrate through the holes made from the sewing machine needle holes.
  • Soft shells, on the other hand, are designed for cold, mostly dry weather, with the possibility of a light rain. They provide a layer of insulation, unlike a hardshell which primarily just blocks the wind. Soft shells are very bulky compared to most hard shells, so if I am going to wear one, I use it on a day where I can wear it all day long and then remove layers underneath it. The big advantage of a soft shell is that it is stretchy, thus being more comfortable, especially when I am hunched over in my aerobars. I have found I can wear a soft shell with the front zip open up to temps of about 55-60F.
  • Hybrids are typically found on non-cycling apparel and have a hard shell waterproof/breathable fabric on the shoulders, while putting a stretchy softshell fabric elsewhere.
  • On more temperate days, where there is no forecast of precipitation, I will wear just a wind shell only. A wind shell is usually a jacket made from thin uncoated nylon or polyester fabric. The outer layer typically has a DWR treatment which will handle a light mist but not good in a real rainstorm. Some of the newer models use 40- or 70-denier fabric this is very lightweight and can stuff into it’s own rear pocket the size of an orange.

I also may pack a pair of arm warmers and use them when I remove my long sleeve mock turtle-neck shirt. The Pearl Izumi ELITE Thermal Arm Warmer is a good model and is thicker than other brands I have tried. I don’t care for the Pearl Izumi P.R.O. Softshell Arm Warmer — it is too thick and bulky. It is about as thick as my softshell jacket.

Tip #8. Understand the difference between different kinds of jackets, i.e. soft shell, hard shell etc. Pick the best one for your ride rather than taking two of them. The big advantage of a soft shell is that it is stretchy, thus being more comfortable, especially when one is hunched over in the drops or when using aerobars. On more temperate days, where there is no forecast of precipitation, consider using only a lightweight wind shell.

Tip #9. Consider the use of aerobars. It is much warmer when you are in this tucked position as the air literally pushes out and around your body, instead of hitting your chest and face which will cool your core.

Tip #10. Cycle with a friend or group. Drafting behind someone will increase your warmth.

Cold and Rainy Conditions

The coldest conditions I have ridden in are those nasty spring rides with lots of rain. If the low temperatures are around 35-45F and it is raining heavily for multiple hours…it can be game-over for me. I have not found the perfect solution for keeping my hands and feet warm in such conditions. I use a waterproof/breathable helmet cover, with a tail down the back to protect my neck and wear a hat that covers my ears. I suppose a pair of BarMitts would work for my hands, assuming I spent most of my time upright and not in the aerobars. But my feet? I have used thin “rain only” waterproof booties and it seems that over time, the rain will seep through, near the sole, despite a tight fit. My best solution has been using a thin (1.5-2mm) pair of neoprene socks. Maybe a pair of the insulated cycling shoes/boots might help, along with a pair of gaitors to prevent the water from entering from the top. I don’t own full length fenders for my long distance bike and I’m sure that would help.

Summary

As a randonneur, I have a goal of riding at one 200 km ride each month of the year. This generally takes all of the daylight which is available on any given day in December, so I have to move quickly to avoid any cold night riding. The rides in December, January and February are of course the roughest and necessitate the clothing and equipment mentioned above. The coldest I have ridden, with the above gear, is on day that started out at 17F and later to rose to 40F. If the forecast is colder than that, I drive 2-1/2 hours to southern Utah (or further to Las Vegas) where the elevation is lower and the temps are 20-30 degrees warmer. My biggest problem, as might suspect, is keeping my toes, hands and ears warm. I suppose I could purchase some of the winter-specific cycling shoes, but I have not yet investigated the useful temperature range of them. Keeping my fingers warm is another issue and the use of lobster-style gloves or electric-battery heated gloves would be necessary.

Night Riding — Here’s Why It May Be Safer Than During The Day

Night Cycling on Highways

Several years ago, while riding a 600K on a highway in Arizona (near the Grand Canyon), some experienced randonneurs expressed the opinion that riding at night on a highway is actually safer than during the day. Since that event, I have often wondered about this.

A few weeks ago, I did a 200K (125-mile) training ride. Because of predicted gusty winds of 40 MPH I decided to do a pre-dawn start so those winds would be to my back when they finally hit, later in the day. (This turned out to be a perfect plan as I had them to my back for the last half of these ride and was able to fly along at 27 MPH on the flats, solo…but that is another story!) Early in the ride, my route took me on a short section (~ 8 miles) of I-15, where the speed limit is 80 MPH. I had on my usual reflective clothing, which was a reflective vest and ankle bands. I also had on two red 1/2-watt blinkies, both of which were in blink mode. One on my left seat stay and the other on my ankle that goes up and down while pedaling, providing even more attention. During that section, while on the broad shoulder of the freeway, virtually every vehicle (including many semi-trucks) changed lanes to avoid me. I have ridden this same section during the day, and vehicles rarely changed lanes when they came upon me.

Later that morning, while it was still dark, and on a different two-lane undivided rural highway, which had a very small shoulder…every vehicle either swung wide as they saw my lights in the distance. Then, an hour or two later, shortly after dawn, when my lights were not bright enough to penetrate the darkness (I still had my blinkies turned on…just to be sure), vehicles were cutting me much closer. Occasionally I would ride on the outside or right side of the rumble strip when there was room, but that was not always possible. This simple test proved that on rural roads or highways, night riding was indeed safer than riding during the day.

Please note that I had my rear blinky lights blinking and not on solid mode…that tells motorists that there is either a slow-moving vehicle, person receiving a citation or an accident ahead and to slow down and/or change lanes. I completely disagree with some that state that cyclists should ride with a solid red rear light, as a blinking light causes impaired drivers to steer toward you.

Now, for riding in urban areas, night riding may be less safe as there are so many other distractions and lights, including street and store signs and the glare of other motorists headlights blinding both cyclists and motorists alike. This can be especially hazardous during the hours of dawn or dusk as bicycle lights may not be bright enough to cut through the semi-dark conditions.

Also, be aware that riding at dawn or sunset (especially while going climbing or descending in a canyon), conditions where the sun may be blinding motorists easily, it behooves you to keep your tail light on…just to be safe.

Related posts: Bicycle Tail Light Review

8 Cycling Showstoppers & How to Prevent Them

During the middle of July (2015), while riding a 600K (375 miles in just under two days…or sometimes in one long day), I reflected upon the various reasons why some cyclists do not finish long rides. The three most common problems are listed first.
Aside from my eight points below, check out this interesting 2019 article entitled “Bad Day Syndrome,” from the CTS site.
  1. Gastrointestinal Distress: Some endurance athletes have GI problems that cause their stomach to stop accepting food or fluids. Fortunately, I have had good luck in this area. This podcast with Ben Greenfield interviewing Allen Lin (Scratch Labs) and his theory indicates that we should be eating more solids, rather than a liquid diet. Solids will slow down your stomach emptying, thus making it more stable. This flies in the face of Hammer Products, who believe the opposite is true.
    Either way, consuming electrolytes, and not just plain water is imperative to stave off bonking. How much to take is subject to discussion. I personally use the elete-brand liquid add-ins to my plain water bottle and then a sports drink to my other bottle. I use Endurox, which has protein which is good for events exceeding three or four hours, or Heed, which only has carbs, and is my favorite “subtle” flavored drink. Per Seattle randonneur David Roberts: Tums are useful for stopping cramps. Chew one at the first muscle twinge. If it keeps on coming on, chew another. Brand name Tums, regular strength work best. Again, they seem to work too fast for the stuff, whatever it may be, to get into the bloodstream, although sublingual might be really quick. It’s definitely not the calcium. Blood sugar levels are also important: When you’re trying to change a flat alone in the dark and it’s raining, maybe suddenly you find yourself crying. Eat something. Any time the idea of quitting enters your head, eat something. If your power is dropping on a long climb, eat something. Many times negative feelings can be banished by eating. The rest of the time it’s dehydration. (June 2016)
    • Here is a informative article on the Ultracycling site about muscle cramps.
    • An article from The Science of Sport website.
    • I recently heard (May 2017) that consuming fatty foods helps prevent GI distress & sea sickness. Summer sausage & cheese are two of my favorites on climbing or backcountry skiing trips. It coats the walls of your stomach making it less sensitive to distress.
    • Also, check out this 2015 article on the Bicycling Magazine website.
    • “This has led to the realisation that gut problems in athletes are not one-size-fits-all, and culminated in a new term, “Exercise-induced Gastrointestinal Syndrome”, which describes the numerous ways athletes can experience gut problems.” Quote from this Cycling Tips article.
    • Wikipedia says that Exercise-induced nausea may be caused by “Exercising at a heavy rate causes blood flow to be taken away from the stomach, causing nausea.”
  2. Pressure Points: Cycling has several pressure points where you body meets the bike — feet, hands and butt. Creating a comfortable ride, sometimes at the expense of a little extra weight is worth it. For me, my downfall has always been saddle discomfort. I have had saddle sore issues since day one. Sometimes, I can go for two seasons without any problems, but then, sometimes out of the blue, things blow up. Frequently, in the spring, I test new saddles, for inclusion on my website, or as I am always seeking the “the one.” Because of that, during the process of changing out from one saddle to another, or from one bike to another, my body doesn’t get a chance to adjust long enough. Elsewhere on the blog, you will find my experiences with many different kinds of saddles.
  3. Attitude: I came into cycling, after having done many mountaineering and backpacking trips, in both summer and winter. Those adventures taught me two things..plan and prepare well, but keep a positive attitude, as some things are just out of your control. Just deal with it and don’t quit. If the weather goes south, or you are lost, or you are experiencing mechanical problems, try to stick it out. I guess you could call me a summit-bagger. In mountaineering, we wanted to complete the climb by going all the way to top — quitting early was a DNF, something I didn’t like.
  4. Body Weight: Many serious amateur and pro cyclists have a body weight between two and 2.5 pounds per inch of body height. It’s important to have your power and strength ratio to a point where you can climb up hills at a reasonable speed and/or go up and over rollers without too much hesitation. For me, my shortcoming is my love of wheat or gluten products, especially pastries. I also like other products foods that are high on the high glycemic index which include corn, corn chips, and potatoes. I am not saying you should be gluten-free by any means, but replacing many of the wheat products with vegetables will help a lot.
    Another note on body weight during an event: if your body weight is way down during an event, then most likely you are not hydrated. On my first 100-mile ultrarun, they weighed all participants at the beginning and then later, at about the 70-mile mark. If my weight had been too low, they would have pulled me and got me on fluids until my weight was back up.
  5. Moving Speed: Some cyclists just train alone (like me, since I live in a rural community with few other roadies), but it is very difficult to gain speed by riding alone. Riding with a small group of friends, especially those that are faster and you, will help immensely. Some folks believe that for endurance long-distance cycle if you do not need to develop speed work. I completely disagree. By doing speed work with these so-called club brides, it brings your heart rate up to a high point which is invaluable in longer rides. I also do interval work on gradual hills, but nothing matches the competitive spirit of trying to stay up with someone else while sprinting on a flat, or climbing.
  6. Sleep: Many of us are so nervous the night before an event, that we sleep poorly, so the key is to get a solid nights sleep, two nights before big events. When doing multi-day brevets (i.e. 600 km or longer), the key is to leave each morning before the control (or checkpoint) closes. Leaving after the closing time means you are chasing the clock in a big way. When I ride 1000 or 1200K events, I need 3-5 hours of sleep each night, otherwise I just get too dang tired during the hot afternoons. Because of this, one my driving forces during my many workouts is to increase my speed, so I can get enough sleep during multi-day events.
  7. Breaks: Recently, a good cycling friend, Kerin Huber, from California, mentioned (while we were doing a 1000K), that the key to getting a good time on long rides, it not necessarily your moving speed, but how often and how long you take at each stop. During brevets, some cyclists dilly-dally at the c-stores and eat up too much time. Others like to take multiple opportunities during the day to eat at sit-down restaurants, instead of doing “grab and go” food. I tend to like to only eat major meals only once or twice per day, while the balance of my calories is on the run, or eaten curbside.
  8. Efficiency While Riding: Some randonneurs feel that drafting is only for racers and not appropriate while riding brevets. I believe that one should do whatever is necessary to increase your moving speed, so that if there is an unexpected problem (mechanical, GI, weather etc.) you have more time in the bank — it serves like an insurance policy. Drafting at night is OK, IF one leaves a little more space that usual. I recall on early on day one of a 1200K, that two individuals, both out outside the US, touched wheels at night and both went down, causing one to get a broken hip.
    Sometimes, while riding late at night, If I am tired, having someone next to me and talking will keep me going without fatigue. Though not as efficient as drafting, it will allow one to keep on moving.

Creaky Bottom Bracket?

Trek Domane
 
This is my long distance rando bike which is the all-carbon model, the Trek Domane, with a BB 90 bottom bracket. It used to creak a lot. With every pedal stroke.I repeatedly lubed the bottom bracket to no avail. Finally one mechanic told me to use Loctite between the bearings and the edge of the frame which I also did, but that also did not help.

Finally, another friend suggested that I simply tighten the skewers on both wheels very, very tight. I did not believe him, and  still took it to my mechanic, who finally found this simple technique as the solution. He and I were both dumbfounded– it worked and after several thousand miles it has not creaked  once.

Incidentally, the best way to check whether or not the noise is the bottom bracket and not your pedals, is to simply step on the crank arm itself against the direction of the chain, so the wheel does not turn. Press or bounce up and down with your full bodyweight and listen.

Cycling Gloves — Quick Review

Fingerless Gloves

I have a pro-deal with Pearl Izumi, so I tend to buy perhaps more apparel than I need…(yet, much of it, I unload on eBay or Amazon if it doesn’t work for me). Earlier this summer (2015), I picked up a pair of the Pearl Izumi’s top-of-the-line fingerless cycling glove called the Men’s ELITE Gel Glove. What a mistake. Look at the pads—they are SOOOO thick! And the pads seem to be in the wrong location anyway yielding hot spots.

So then I picked up a pair of the XXL Lizard Skins LaSal 2.0 gloves. What a difference. They have just the right amount padding, but not too much. And also, the finger part of the gloves actually extends down more than 3 or 4mm like others do. This is my top pick for a fingerless. The runner up is the Chiba Gel Comfort glove (not shown).

Full Finger Gloves

I believe a full-finger glove’s purpose is to get your hands warm in cooler weather, but yet many have so much mesh that it doesn’t fulfill that purpose.

For several seasons, my go-to glove for moderate temperatures (my recommendation is 40-60F & light rain) is the XL Outdoor Designs Cycleflex gloves. They have a Polartec Power Shield liner which is windproof, but yet breathes enough. The build quality on these gloves is top notch, esp. the detail in the “fake” leather palm area. I just wish my U.S.-distributor imported in the U.S. the XXL version as the XL is tad too small for me. This company is big in the U.K. where they are based, but obscure in the U.S. so this product is hard to find. Lately (2017) I have been using the Pearl Izumi Cool Weather Glove in an XXL size. It does not have the robust construction of the Cycleflex gloves, but squishes down smaller in my bag when I switch to fingerless gloves. It is a good slope season full-figure glove.

I tried the Lizard Skins Monitor 1.0, their top-of-the-line full-finger glove. What a joke. Mostly mesh. Doesn’t keep anything warm. Send em back! The Craft Control Bike glove is similar — mostly mesh and little added warmth.

For cooler temperatures (my recommendation is 25-50F), I have been using the Pearl Izumi ELITE Softshell glove. Despite having thick gel pads like the fingerless model, I didn’t notice that pads, due to the 100 g Primaloft insulation in them. This glove has been very nice for temperatures from just below freezing to 45F, or sometimes in the mid 50s. The dexterity is reasonable, considering the insulative value. Since I’m 6’4″ most jacket sleeves don’t extend down far enough to cover my wrists while in the aero position, so I am always looking for a cold-weather glove with a longer-than-average gauntlet. These have a long gauntlet which works well in my attempts to stay warm.

For more extreme temperatures, I have gone to using full-on mountaineering gloves. I have used an XL 2013 version of the Outdoor Designs McKinley Mountain Gauntlet which has a 100 g DuPont Thermolite Active insulation sewn into the outer glove plus an Event waterproof/breathable membrane. It has a removable insulated liner glove, which I frequently replace with the Outdoor Designs Cycleflex, or better yet, the XXL Craft Storm glove. (The stock liner is just too bulky for cycling). The Storm is a nice mid-weight glove made from a combination of fleece and neoprene type fabric. It works well in a light rain too and by itself, and is useful in temps from about 40-60F. I also use the Storm a lot for randonnée or backcountry skiing (with the Denali in my backpack for sub-freezing temps [0-40F] or extreme winds found at above-timberline elevations).

Full Finger Gloves for Rain

Earlier this year, on a spring ride (a 400K which we all DNFed due to the cold), we had temps around 40-45F with a constant downpouring of rain. I had a pair of Outdoor Designs Summitlite gloves with a liner, but I just couldn’t stay warm. Besides, the bemberg liner on those gloves would come up when I removed my hands (if I forget to pinch the glove finger ends) and then it was near impossible to insert them back in. Needless to say, my fingers were cold. Since then, I picked up a pair of the XXL Pearl Izumi P.R.O. Barrier WxB gloves, which are a mid-weight glove with Outdry, a waterproof/breathable membrane. I plan to line them with a lighter fleece glove or the Storm Craft. I have yet to use these. I plan to take them on long trips where there is expected to be cold and rainy conditions.

I have also used the Seirus All Weather Xtreme™ Glove for rainy conditions. It is OK down to about 45-50F and rain. But like I mentioned above, the liner has a tendency to come out when your hand is removed.

Another style I have used are scuba-diver/river runner neoprene gloves (& socks too) for super rainy conditions. They work well, until the temps drop below 45F, then, for me, my fingers just don’t stay warm.

I have heard that for super wet and cold conditions, the only glove is a PVC seamless rubber glove…the type used by fisherman working in the arctic (or those to clean your oven). Then line it with a tight-fitting fleece or wool glove, which can be replaced every few hours, if it gets too sweat-saturated. In 2016 I purchased the Atlas Vinylove 620 for this purpose, but our season was remarkably dry so I did not get a chance to use them (I spent most of that spring rando skiing instead of cycling). They are bulky enough to slip a liner inside them — I will report in after using them.

How to “Randoize” a TT Bike


Last year, I was surprised that on the 24-hour races I was in, how many how full-on TT bikes there were, instead of a regular bike with clip-on aerobars. In December of 2014 I picked up a 2nd hand Cervelo P3C time trial / triathlon bike (for a song). Since many (most) of my training rides are solo, I figured “why not use a TT bike?” as it is faster. The exception is those routes that have a lot of steep climbing as the front chainring is 53/39, instead 50/33 like my other distance bikes. So this summer, but many of my 100K and some of 200K rides I have been using this machine.

Here is how to “Randoize” a TT bike (trick it out for use in randonneuring):

~ Add a second water bottle up underneath the aerobars with a hose that I can reach while writing. (This bike only has one water bottle attachment point.)

~ Add a custom-made eoGEAR bike bag that has Velcro long enough to go around the flat seatpost.

~ Long cage derailleur and a 12/30 cassette to make it easier getting up those nine or 10% hills.

~ Add a light extension bracket so the front main light is sitting below the handlebars. This position shows the texture and holes in the road better.

~ Mountain bike pedals to facilitate shoes that are easy to walk in.

~ Heavily padded TT saddle which presumably will absorb some of the vibrations of this stiff bike.

~ 38mm carbon wheels switch still except a standard 48 mm Presta valve. Deep enough to be slightly aero, but not so deep you get blown over in most cross winds.

Piña Colada Smoothie

IMG_1286.JPG
For some reason I eat a different smoothie after strength training/weightlifting then I do following endurance training. This is my post strength-training piña colada smoothie. It consists of 8 ounces of pineapple juice, 4 ounces of coconut milk, one banana, handful of ice, a scoop of protein powder, a few tablespoons of flaxseed/wheat germ (I combine them together in advance) and of course several scoops of flaked unsweetened coconut. Mix it using the “milk shake” mode with this blender, otherwise the texture of the ice and coconut gets pulverized.

For endurance training, I usually consume a strawberry/banana/orange smoothie with a handdul of greens stuffed in it. I like this piña colada better, but I just don’t get enough greens, so I feel guilty making the piña colada every time.

Cycling Hill Climbing Tips

IMG_1058.JPG

A recent editorial in Bicycling Magazine reminded me of some tips for climbing.

They suggest to first scoot back on your saddle, which I already do, but they also suggested to drop your heel as your foot rotates across the top of the pedal. On mild terrain (3-5% grades) I also try to lift with my foot too, but on steeper terrain, I generally just mash.

Speaking of mashing, my friend, Kenneth, as shown on a Super 600 route in Utah (600 km in 50 hours or less…375 miles with 32,000 feet of climbing) did not use clipless pedals, but rather sandals with platform pedals. He said that he likes to move his foot forward on the pedal, so his arch is right over the pedal and then mash, or just push down hard on hill climbs. There is wisdom to that because sprinters like to have their cleats mounted forward, but long distance guys, like me, have them shoved all the way back. I have even heard of some German bike fitters that put the cleats almost underneath the arch of the foot. Now I see why — on a recent hill interval workout, I wanted to pull my foot back so my arch was right over the spindle of my pedal.

Additionally, while doing steep climbs, don’t be afraid to stand up as it helps straighten out the leg and knees for additional comfort.

I also do several strength training exercises (usually twice a week throughout the year) including planks and the so-called Roman chair to strengthen my lower back,  usually with a 12 to 15 pound weight in my hands.

Super 600 — My Toughest Two Days on a Bike…Ever

Introduction

Within the past year or so, the randonneuring world was introduced to a new type of event. It is called a Super Randonneur 600 Permanent, or just a Super 600, as it if most often referred to. SR600’s are permanents, and not a “brevet” which is a scheduled ride. Permanents can be done any time. A Super 600 must be between 600 and 619 km (375 miles) with at least 10,000 meters of cumulative vertical gain (32,808 ft) and must be finished in 40 hours (a few years later, the rules were changed, allowing 50 hours). During the summer of 2015 I beginning designing a Super 600 here in Utah. With our many ski resorts nearby Salt Lake City, we have plenty of canyons and mountain passes. With a lot of help from fellow randonneur (Kenneth Moss, from the Salt Lake area), we came up with this design. The route is officially called the Wasatch Range SR600. It starts in Cottonwood Heights (Salt Lake valley), overnights at my house in Mount Pleasant, and then works it’s way back north to the start.

Day One — 214 miles, Four Major Mountain Passes for a total of 18,600′ of Climbing

At a little after 4 a.m. on September 11th, 2015, Kenneth and I set out to slay this beast. He is much younger than I (I’m 61), so he had to exercise a little patience on the climbs as I could not keep up with him. We started up Big Cottonwood Canyon in the dark, and with little traffic in the canyon, made our way to the top of Guardsman Pass right at dawn. The temperature was nice at the start, around 55F and quickly cooled as we climbed up in elevation. From the top of Guardsman Pass, we dropped down one of the steepest (and roughest…my tail light rattled off) paved roads in Utah, toward Midway.

We then headed up towards the small town of Francis, just south of Kamas and made our first c-store stop, topping off our bottles and stomachs. From there we headed up and over Wolf Creek Pass. The top of the pass has some campgrounds and we were hoping for water, but since it was after Labor Day, they had already turned off the spigots. We had some reserves and continued down the other side. Eventually, in the small town of Hanna, we found a cafe that was open and stopped in to rehydrate. From there we continued the gradual descent into the town of Duchense and immediately found the local Subway. After Duchense there were no open services until our overnight stop at my house, which was about 100 miles. In Duchense, I ordered a 12-inch sub and only ate half of it, taking the half in my seat bag for consumption later. There was one c-store at about 70 miles after Duchense which reportedly had a water spigot outside their building. Consequently, I brought some Potable Aqua iodine tablets to purify water along this section. Kenneth, on the other hand, choose to purchase extra water bottles and stuff them in his jersey pockets. Before the ride, I carefully examined the route using satellite view and find some possible water sources near the road. I stopped several times on the descent of Indian Creek Pass trying to find the ideal spot, which I finally did, near the bottom of the descent. I refilled two of my bottles (I brought a screen strainer too) and added a few tabs in each and proceeding along. It was now late afternoon of the our first day.

After Indian Creek Pass, we made our way onto busy U.S.-6, but only for a few miles and then started the climb up and around Scofield Reservoir. On the south end of the lake was a sole c-store which was closed (but we new that in advance). It was about 10 p.m. As it turns out, there was a water spigot as promised by the store owner and we both topped off our bottles. We had one more climb ahead of us before the our overnight stop. The temperature was about 48F at Scofield, but it felt a lot colder, due to fatigue. I had already put on my wind jacket. I had arm warmers and a vest underneath. Kenneth only brought a vest and arm warmers, so on the upcoming descents later than night, he was really suffering, due to the cooler temperatures. My GPS registered a low temperature of 36F along the top of Eccles Canyon / Skyline Drive, which we rode through at about midnight. It felt good to be climbing as the descents were so dang cold. We made our way up and finally down Fairview Canyon (top of Skyline Drive), one that I am familiar with, yet Kenneth, who did not know this canyon, but yet with his fat and stable 42mm-wide tires did not hesitate on the descents. He really bombed them. But he  waited for me at the bottom of each! His Strava upload showed a maximum speed of 48.5 MPH during our event. We finally made our way to my house, arriving at about 12:30 a.m. My wife had prepared a pasta casserole dish which I consumed. Kenneth’s stomach was not cooperating, so he ate little until the next morning, where he was finally able to take in more calories.

Day Two — 166 Miles, Three Major, and One Minor Mountain Pass for a total of 16,000′ of Climbing

We got about 4.5 hours of sleep and started day two at about 7:00 a.m. At my home, I had an extra cycling jacket which I loaned Kenneth, which he used during the night portions of this final day. From Mount Pleasant, there are about 30+ miles of rollers to the base of the Nebo Loop. We started our climb up the south side of this mountain (the steepest side of this road with grades hitting 15% for short sections) and it was beginning to heat up, but as we gained elevation it almost cancelled out the heat, so this ascent wasn’t too bad. After descending Nebo loop (which has three or four false summits), it dropped us into Utah County and things were really hot now (85F?)…but frankly, it felt good, after the prior night’s cold suffer-fest.

We stopped at a local hamburger shop in Spanish Fork and had a long sit-down lunch. We then rode across the valley towards Provo Canyon, did a short out and back part way up the Squaw Peak overlook road, before finally heading up the Alpine Loop road. I have done this loop from the other direction, but not from this side, so it was enjoyable to riding new terrain. It goes past Sundance ski resort and travels by Mount Timpanogos, a peak which I frequently ski-climb. By now, it was late in the afternoon, so most of this climb was in the shade — perfect conditions for a long ascent. By now, my lower back was giving me fits on the steepest grades. At the “less steep” grades of 5–8% my back was fine as I could turn the pedals just a little quicker. Before this trip, I upgraded my cassette from 12-30 to a 12-32 (my crankset is 50-33). That was simply not enough. I should have gone with a 12-36, but didn’t want to change out derailleurs. Live and learn. Kenneth, on the other hand, had much lower gearing and didn’t have any such issues. I managed to get through this climb without getting off the bike, except perhaps once, at a water break.

After the Alpine Loop climb and descent, we stopped at a c-store and replaced some much-needed calories. The sun was now setting, so we donned our reflective gear and heading up the short Traverse Mountain climb. On the other side of this climb, shortly after starting the descent, great views of the lights of the Salt Lake valley came into view. I stopped a few times to grab some photos. Kenneth, quickly descended, but patiently waited at the next turn, as he was familiar with this part of the route—I was not. We were now in Draper, a suburb in S.E. Salt Lake and had a “mere” 34 miles left. But we also had one of the roughest climbs left—Little Cottonwood Canyon, which topped out some 4,200 feet above. There were no services until the finish—I was worried about not having enough water and topped off one of my three bottles from a sprinkler that was running in someones yard (I ended up not needed it, as it was rather cool, once we entered the canyon). The actual canyon is eight miles long and has a consistent grade of 7 to 9% with some sections at 12-13% (my GPS light was off to save battery life, so don’t know what it actually read), but no flat sections giving one break. The bottom is steeper but near the top it backs off a little. At this point, despite takings a lot of ibuprofen, my lower back was really killing me. I was only moving at 4–5 MPH in parts. The only fix was to dismount and stretch. Afterwards, I could ride pain free for a few minutes before it started up again. I stopped perhaps six or eight times, but did finally catch up to Kenneth, who had paused earlier to add some more layers. We were now at some of the buildings of Alta Ski Resort (one of the few resorts in Utah that disallows snow boarders…so yes, this IS a true “ski” resort). I was getting cold, due to a light breeze and the higher elevation, so we stopped in a vestibule entrance of Alta, out of the wind, where I put on additional layers. From there it was just a few more minutes climbing to the upper parking lot of Alta, our final control. WE MADE IT. FINALLY! No more climbing.

The rest was all downhill and back to our 24-hour c-store. We arrived there a little after 2:30 in the morning for a total time of 45:36. 50 hours is the time cut off, so that was never a concern for us, but then we managed to pick a weekend with flawless weather (cool, but not freezing nights, fairly hot days; little wind; no precipitation in the forecast) and neither of us had any major mechanical problems.

Summary

Would I do another Super 600? Only if I get some lower gearing and the weather conditions are “just right” as it was for us. Having a partner that is fast enough to make the climbs at a decent pace, but willing to chill a little while waiting for me is helpful. In hindsight, I’m sure Ken would have brought more clothing. The forecasted low was about 45-50F at elevation, but for some reason the Eccles Canyon/Skyline Drive was cooler than that, dropping to 36F.

On our second climb on day one, Wolf Creek Pass, it had very little traffic and so we frequently rode side-by-side up this section. I explained to Ken that I was deliberately holding back on my speed up this gradual climb, as I wanted to keep an eye on my hear rate (which is displayed on my Sigma ROX 10 GPS, which is mounted on my handlebars). I was trying to keep it around 70–75% of my maximum, so as it not “burn any matches” before the last day. Typically, on shorter events, I try to climb with my heart rate between 80–85%, sometimes hitting the low 90s. When cruising the flats or gentle rollers, it usually runs at about 70–75%. On our last climb of this ride, I was lucky to get it up to 70%, as it was hovering about 60-65% of my maximum.

Miscellaneous Specs

Passes, in order of appearance. With the maximum elevation and elevation gain for each pass.

  1. Guardsman Pass (top of Big Cottonwood Canyon) 9,791′ (2984 m). Gain of 5,277′ (1609 m) from our c-store which was several miles below the mouth of the canyon.
  2. Wolf Creek Pass 9,485′ (2891 m). Gain of 3,259′ (993 m).
  3. Indian Creek Pass 9,068′ (2763 m). Gain of 3,553′ (1083 m).
  4. Eccles Canyon (a.k.a Skyline Drive), 9,413′ (2869 m). Gain of 1,780′ (542 m) for tallest summit, but several other shorter climbs.
  5. Nebo Loop 9,345′ (2848 m). Gain of 3,530′ (1076 m) for tallest summit, but several other shorter summits.
  6. Alpine Loop 8,060′ (2457 m). Gain of 3,557′ (1084 m) with a shorter intermediate climb thrown in to bring the total climbing up to the mandatory 10,000 m.
  7. Traverse Mountain 6,135′ (1869 m). Gain of 1,336′ (407 m).
  8. Little Cottonwood Canyon (i.e. Alta ski resort at the top of this dead-end canyon) 8,724′ (2659 m). Gain of 4,200′ (1280 m) from Draper. From the mouth of the actual canyon it is “only” 3,333′ (1016 m).

The “gain” spec is the amount of continuous climbing from the base of each climb.

It is possible, that this is one of most difficult SR600s worldwide, due to the fact that it has five passes over 9,000 feet and two over 8,000 feet. This may have the highest “average” mean elevation of any SR600. If you take an average of the seven passes over 2000 m, it is 2781 m (9,124 feet). Because of this, randonneurs traveling from regions at lower elevation would be well advised to acclimate a week or so prior to attempted this route.

Gear I used: 60cm Rocky Mountain Prestige all carbon road bike with a mechanical 10-speed 50-33 crankset (the 33 is a special chainring which uses the standard 110 BCD; made in Italy by PMP) and SRAM PG-1070 12-32 MTB cassette. Rim brakes. DT Swiss alloy 1450 rims with Continental 4000 S II 25mm tires. Prologo Scratch Pro (143mm wide). No aerobars. Sigma ROX 10 GPS with chest-strap heart rate monitor. eoGEAR 6.6 Roll-top bag with add-on 2.5 pouch, mounting using a prototype lightweight dual bracket. Pearl Izumi MTB carbon fiber shoes (X-Project 2.0) with SPD cleats & Shimano A520 touring clipless pedals.

Links

Kenneth’s Blog Report

Official “Permanent” page with Specs on this Route

My Strava Upload

Ride with GPS Link

Openrunner Link

Listing of Super 600s Worldwide

Listing of Super 600 Results Worldwide